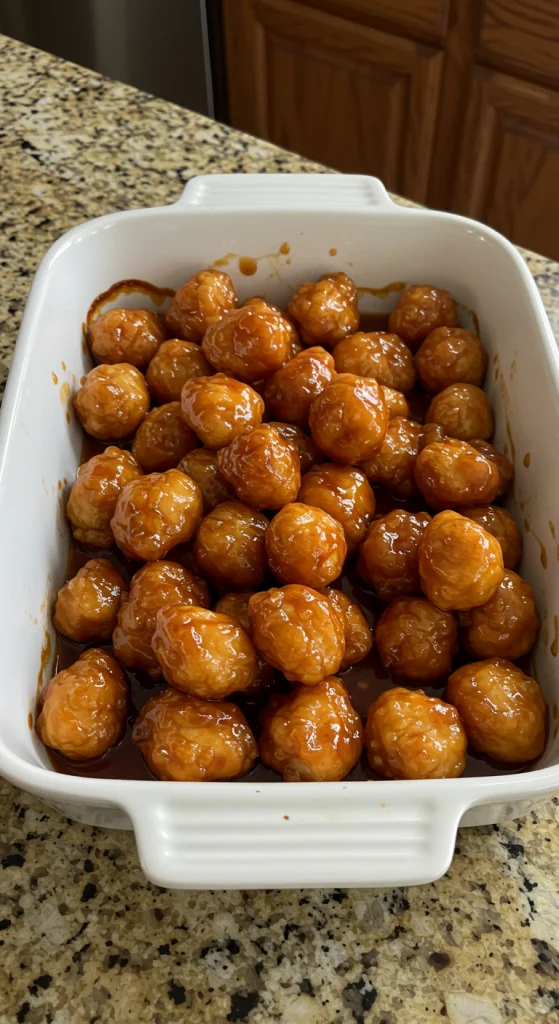
Baked Sweet and Sour Chicken

When I first decided to recreate my favorite takeout meal at home, I wasn’t expecting such a complete flavor explosion. But that’s exactly what happened with this Baked Sweet and Sour Chicken. There’s something incredibly satisfying about crisped, oven-baked chicken soaked in a tangy, sweet glaze that clings to every bite. The best part? You can whip this up without deep frying, and your kitchen won’t be left smelling like a fryer.
I remember standing in the kitchen, tossing the sticky, golden-brown pieces of chicken in the homemade sauce, thinking, “Why didn’t I make this sooner?” It hit every craving without the heavy grease, and it was so easy to clean up afterward. The sauce alone is a reason to keep this recipe on repeat – sweet from pineapple juice and sugar, balanced by a bright punch of vinegar.
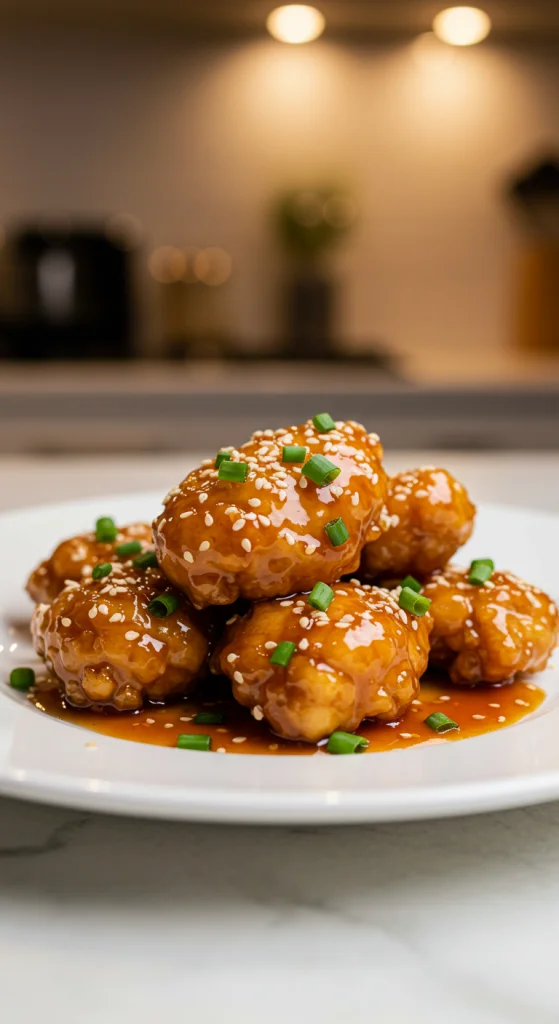
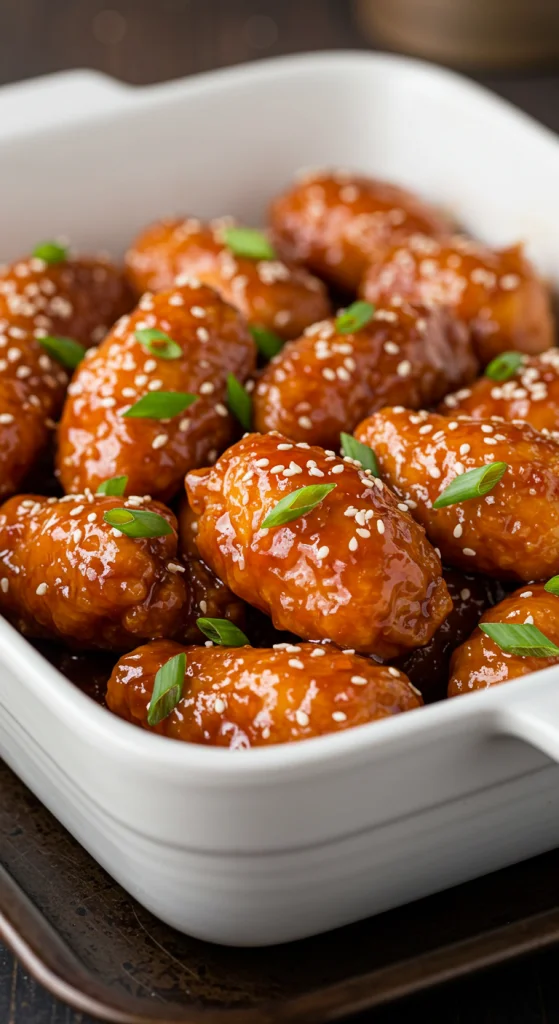
This recipe is also family-approved, which is not easy in my house. The crispy oven finish and that irresistible sticky glaze had everyone coming back for seconds (and thirds). I’ve even served it over rice with a sprinkle of sesame seeds and green onions for a takeout-style dinner that gets devoured every time.
Why You’ll Love This Baked Sweet and Sour Chicken
This dish is perfect if you’re looking for something comforting yet lighter than traditional fried options. The oven-baking method gives the chicken that perfect crunch without the fuss of deep frying. The homemade sweet and sour sauce comes together with pantry staples and tastes even better than restaurant versions. Plus, it’s great for weeknights or casual entertaining since it looks impressive but is surprisingly simple to prepare.
Ingredients
Chicken Breast – Boneless, skinless chicken breast is ideal for this dish. It turns out tender inside while the outside crisps up beautifully when baked.
Cornstarch and Eggs – This combo forms the light coating that gives the chicken a slightly crunchy exterior once baked.
Vegetable Oil (for pan browning) – A light browning in the skillet helps lock in moisture and adds color before baking.
Sugar – White sugar is essential for achieving that iconic sweet taste in the sauce.
Apple Cider Vinegar – This provides the sour element that balances the sweetness.
Ketchup – It adds tang, color, and depth to the sauce.
Soy Sauce – A splash of soy sauce brings umami richness and balances the acidity.
Garlic Powder – A subtle background flavor that enhances the overall taste.
Pineapple Juice (optional but recommended) – For an extra tropical sweetness that enhances the sauce.
How to Make Baked Sweet and Sour Chicken
Step 1: Prep and Coat the Chicken
Cut the chicken breasts into bite-sized chunks. Toss them first in cornstarch until well coated, then dip them into beaten eggs. This gives the chicken a light crust that crisps up nicely in the oven.
Step 2: Brown the Chicken
Heat a little vegetable oil in a skillet over medium-high heat. Add the chicken in batches and cook just until lightly browned on the outside. No need to cook it through – it will finish baking in the oven.
Step 3: Make the Sauce
In a medium bowl, whisk together sugar, apple cider vinegar, ketchup, soy sauce, garlic powder, and pineapple juice. The mix should be glossy and slightly thick.
Step 4: Combine and Bake
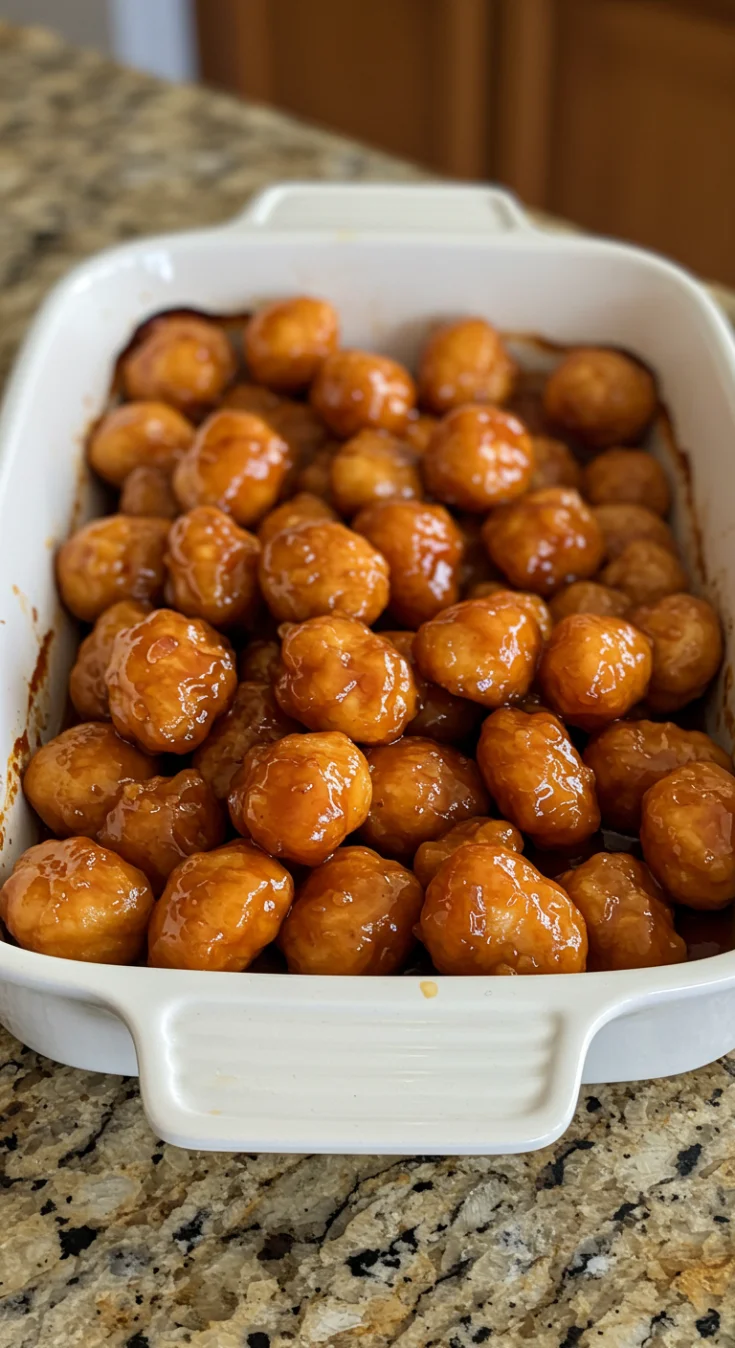
Transfer the browned chicken to a baking dish. Pour the sweet and sour sauce evenly over the chicken. Bake uncovered at 350°F for 40 to 45 minutes, stirring once halfway through to evenly coat the chicken in sauce.
Step 5: Serve and Enjoy
Once baked, the sauce will have thickened and coated the chicken beautifully. Serve hot with steamed rice, or even over noodles for a different spin.
Recipe Variations and Possible Substitutions
You can swap chicken breast for boneless, skinless thighs if you prefer a juicier cut. For a vegetarian version, firm tofu works surprisingly well and holds up nicely when baked. Want extra veggies? Toss in chopped bell peppers or pineapple chunks during baking for added texture and flavor. If you don’t have apple cider vinegar, rice vinegar or white vinegar will also work with slight taste variations. And for a gluten-free option, be sure to use tamari instead of regular soy sauce.
Serving and Pairing Suggestions
I love serving this over fluffy jasmine rice, but it’s also delicious with fried rice or lo mein noodles. For a full Asian-inspired meal, pair it with a side of crispy egg rolls or a cucumber salad. If you’re feeling extra indulgent, add a drizzle of sesame oil and a sprinkle of toasted sesame seeds and chopped green onions right before serving. This dish holds its own on a dinner table and also shines when served buffet-style at casual get-togethers.
Storage and Reheating Tips
Store any leftovers in an airtight container in the fridge for up to 3 days. The sauce might thicken slightly, but it remains flavorful. To reheat, warm it in the microwave or in a covered skillet over medium-low heat, adding a splash of water if needed to loosen the sauce. This dish also freezes well – just portion it out in freezer-safe containers and thaw overnight in the fridge before reheating.
FAQs
How do I keep Baked Sweet and Sour Chicken crispy?
The best way is to brown the chicken pieces well before baking and avoid overcrowding the pan. Bake uncovered so the coating firms up instead of steaming.
Can I make Baked Sweet and Sour Chicken ahead of time?
Yes, you can brown the chicken and mix the sauce in advance. Assemble everything in the baking dish and refrigerate until ready to bake. Add 5 extra minutes to the baking time if cooking from cold.
What goes well with Baked Sweet and Sour Chicken?
Steamed rice, fried rice, stir-fried vegetables, or even a simple Asian slaw all complement the flavors beautifully.
Is Baked Sweet and Sour Chicken gluten-free?
It can be! Just use gluten-free soy sauce or tamari and ensure your cornstarch is certified gluten-free.
Can I use a different protein in this Baked Sweet and Sour Chicken recipe?
Absolutely. Shrimp, pork tenderloin, or tofu are great alternatives. Just adjust the cooking time based on the protein you choose.
Related Recipe You’ll Like
If you’re in love with saucy, baked goodness like this, you should definitely check out my Hawaiian BBQ Chicken for a smoky-sweet tropical twist. Craving something on the creamier side? The Easy Creamy Polenta Shrimp Recipe is a smooth and savory comfort dish. Or go for crispy and cheesy with Cheesy Baked Tennessee Onions as a flavorful side to round out your meal.
Save and Share This Recipe for Later
If this Baked Sweet and Sour Chicken made your taste buds dance, don’t forget to pin it to your Pinterest board so you can find it again anytime. Sharing is caring – send this recipe to a fellow food lover, post it on your socials, or save it to your favorites for busy weeknights. Trust me, this is one recipe you’ll want to come back to again and again.
Baked Sweet and Sour Chicken
This Baked Sweet and Sour Chicken is a delicious oven-baked version of the beloved Chinese takeout classic. Featuring crispy, lightly coated chicken chunks baked in a glossy sweet and tangy homemade sauce, this dinner recipe combines ease and flavor in one dish. With hints of pineapple juice, apple cider vinegar, and soy sauce, it captures that perfect balance of sweet, sour, and savory. Ideal for weeknights or entertaining, it's healthier than fried alternatives and just as satisfying.
Ingredients
- 1.5 lbs boneless, skinless chicken breast
- 1 cup cornstarch
- 2 large eggs, beaten
- 1/4 cup vegetable oil
- 3/4 cup white sugar
- 1/2 cup apple cider vinegar
- 1/4 cup ketchup
- 1 tablespoon soy sauce
- 1/2 teaspoon garlic powder
- 1/4 cup pineapple juice (optional)
Instructions
- Preheat oven to 350°F (175°C). Grease a 9x13 inch baking dish.
- Cut chicken into bite-sized pieces. Coat in cornstarch, then dip in beaten eggs.
- In a skillet over medium-high heat, lightly brown the chicken on all sides. Do not cook through.
- Transfer chicken to the baking dish.
- In a bowl, mix sugar, vinegar, ketchup, soy sauce, garlic powder, and pineapple juice.
- Pour the sauce evenly over the chicken.
- Bake uncovered for 40 to 45 minutes, stirring once halfway through.
- Serve hot with steamed rice or noodles.
Notes
- Chicken thighs can be used instead of breasts for a juicier result.
- For extra crunch, finish under the broiler for 2 minutes at the end of baking.
- Add chopped bell peppers or pineapple chunks to the baking dish for variation.
Nutrition Information:
Yield:
4Serving Size:
1Amount Per Serving: Calories: 737Total Fat: 22gSaturated Fat: 5gTrans Fat: 0gUnsaturated Fat: 16gCholesterol: 238mgSodium: 522mgCarbohydrates: 74gFiber: 0gSugar: 42gProtein: 57g